
I have written this post to put down some information on a project I recently completed, and the success/failures involved might help others doing similar stuff. I've done a LOT of random projects over the years and while I have often relying on reading stuff others have posted unfortunately I haven't really contributed much back other than the odd Tweet. Please note that this is mostly a brain-dump and I won't waste much effort in making it flow well or be grammatically perfect :D
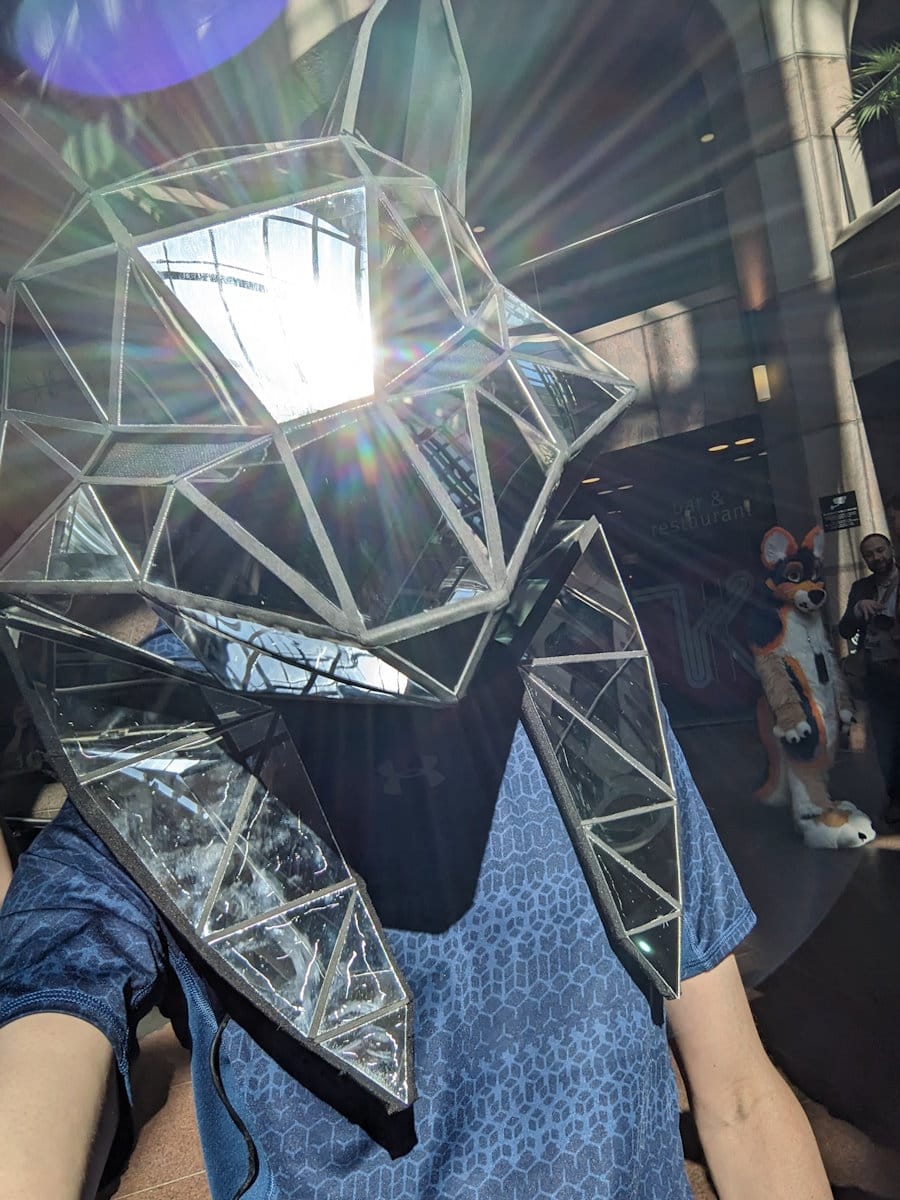
Ok so while I'm not a huge fan of The Masked Singer, I did like the costume which Denise van Outen wore on the (UK) first series. Three years later I decided to attempt a complete replica of the costume, making it as close as I could to the original while maintaining my sanity.
Planning
The first thing was to find as many high quality photos of the original as possible. Thankfully being a TV show there were several high-res media photos, and Denise took the head onto several other shows so there were quite a few well-lit photos from different angles. There were few absolute 90-degree side shots though, so I had to freeze-frame the actual show in a few places and take screenshots. The 'unmasking' episode had a decent shot of the rear and a pan of the sides. The 'intro' video insert of the fox walking down a street had lots of close-ups of some of the leg/shoe detail. Interestingly the head was worn much higher on the wearer's head here, while we do know that the costumes are worn by stand-ins I assume it was shot before the look was finalised. One other thing is that the collar/ruff is flat in the press photos and intro video, but curves upwards in the TV episodes. I assume in screen tests it didn't have quite the look they wanted and it was modified.
The second part of planning was deciding which materials to use, and how it might work. This occupied a LOT of my thinking for a couple of weeks, and then I decided to gather materials for testing.
- How do I design the base, how to get the shape as close as possible? I have no raw artistic talent. Seems a 3D model of some sort will be required.
- How would I make the base, physically? I do have some skills and plenty of tools to do that.
- How are the head plates joined? It looks shiny, maybe silicone sealant?
- The body is a lycra-type suit, but how to attach the mirror pieces? Glue directly? Sew buttons and glue to those?
- Would it be possible to get a voice changing system to have a high-pitched voice like on the show? It would provide a bit of amusement and audience interaction.
- Can I lose enough of my winter tummy to make it look vaguely good?
I researched mirror material and contacted a few companies about availability, and got some samples. For the body, I already had a black zentai for some other reason, but the material was quite thick, so I ordered another (custom fit, from zentai-zentai.com) to see what material that would come with. I can't remember where the other one came from.
The Head Model
After a few attempts at getting software to generate a model from video and stills, I settled on learning enough Blender to sketch the head myself, from static photos of each plane of the head (from press photos of the costumes and screenshots from the TV show). You can import and lock images into Blender, so essentially I imported a front shot, traced it, then flipped to the side, loaded a side screenshot and dragged each point backwards to its position on the side. It worked shockingly well. My main error at this stage was to not use Blender's mirroring feature (because I didn't know that it existed :D), so I worked on the model as a whole.
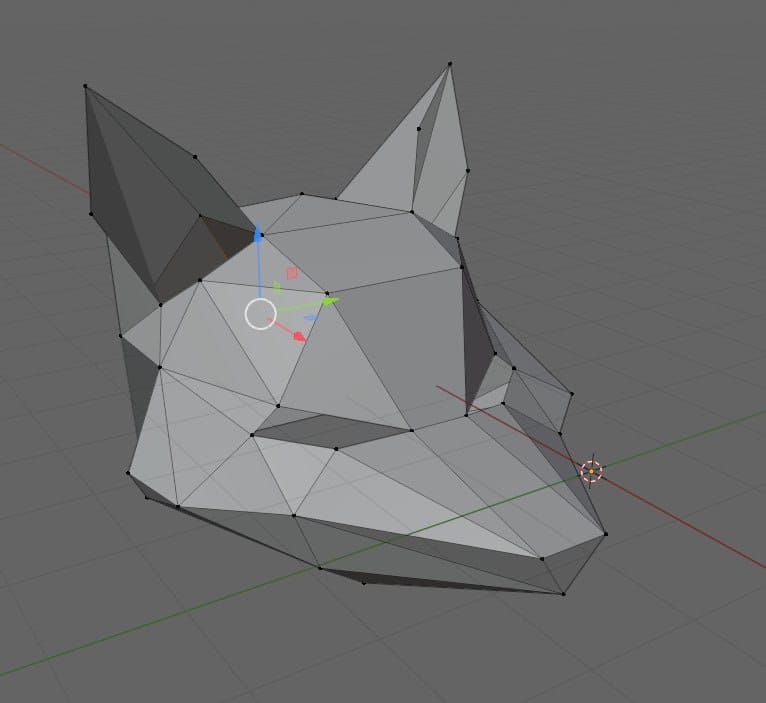
Later in the process I realised that one cheek was not symmetrical, I spotted it and glued a 'patch' on top so it's much closer, but I still know it's a bit wrong...
Anyway, with the head modelled (it only took a couple of evenings I think) I then moved on to making it. I decided to use a process I had done before, where you make the model into Pepakura, and then line the inside with fibreglass, and end up with a very rigid piece. Rather than fibreglass I decided to use carbon fibre matting and epoxy resin, since it's basically the same process and not much more expensive in the scheme of things.
Pepakura is a crafting method where the model is 'unfolded' into a pattern which you can print onto paper or card and then fold and glue into a real thing. I cheated slightly and used my vinyl cutter to cut/score large A3 sheets which saved some time in cutting, and allowed me to make larger sections than I could using an A4 printer. I used Pepakura Designer to convert the model. Blender can export to pepakura, I had a go at using it but the functionality seemed very basic. It's a bit too much to get involved into the unfolding and build process here, there's plenty of help online how to do this. One specific recommendation for UK people is the Everbuild High Viscosity (HV) superglue, available from Toolstation [link]. I used it for gluing up the paper model and the body (further on).
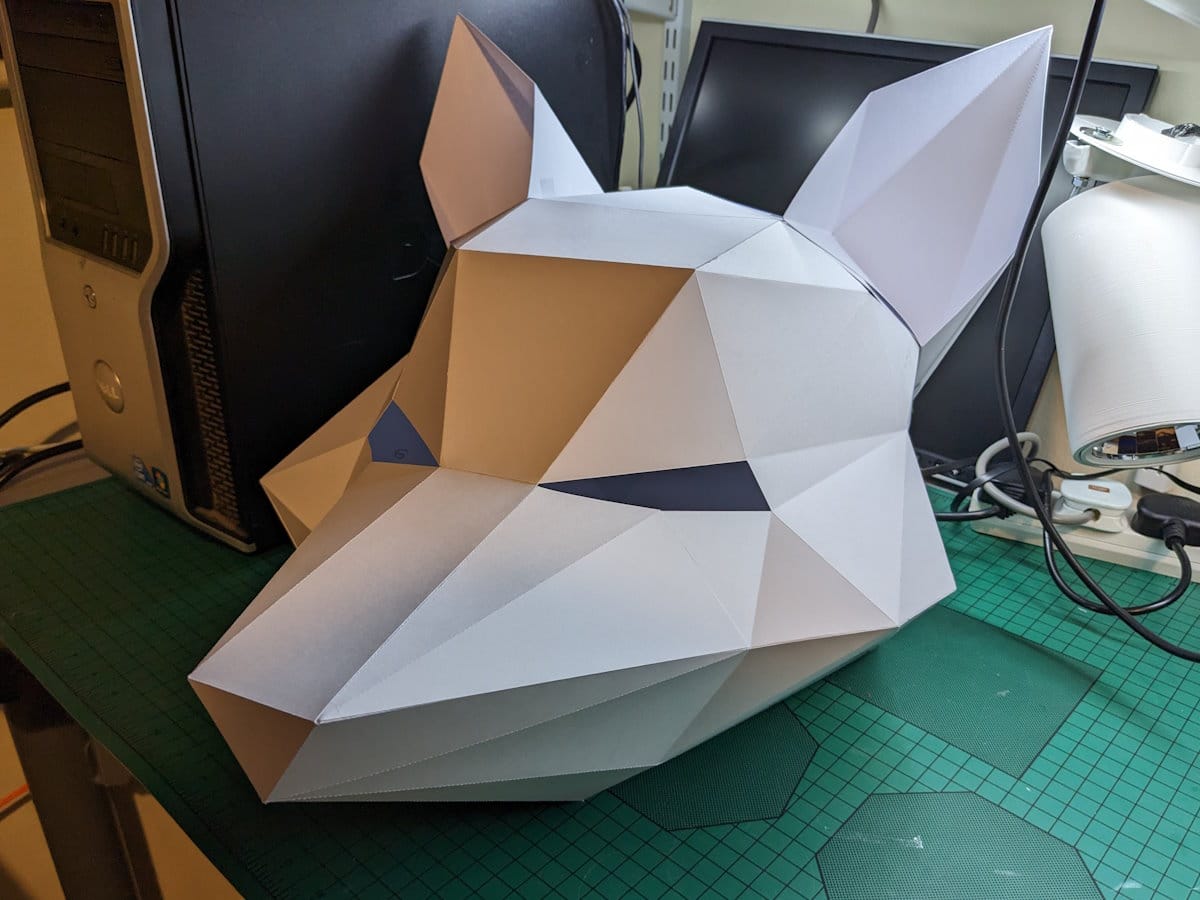
With the model made into card, I then glued wooden sticks inside to stop it sagging. I cut them to lengths measured from the model so that I know it wasn't being distorted from its own weight. You might see that the ears are taped on. I originally intended for them to bolt on separately, but decided against it. I wish I had remade this part of the model, because the 'lip' formed from taping it was a hassle later in the process.
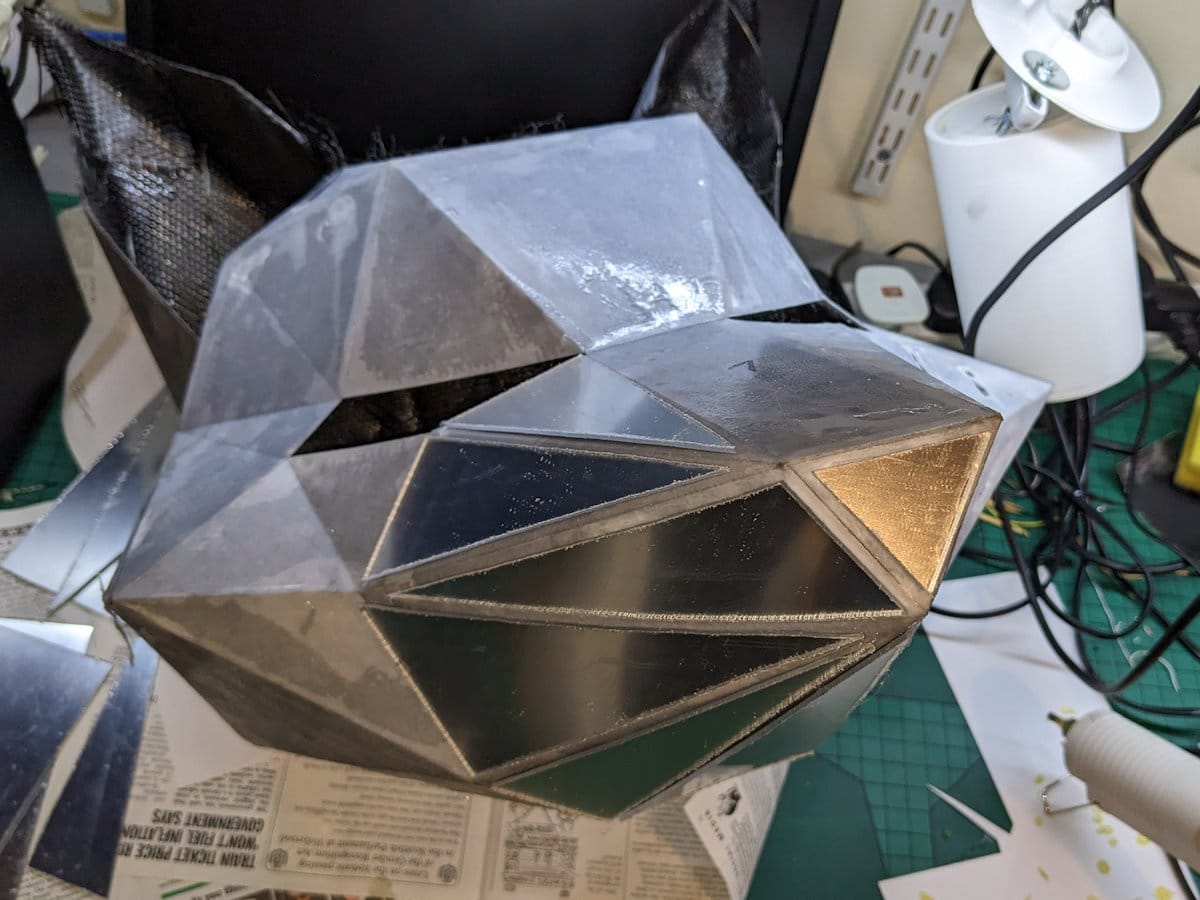
The next stage is to paint epoxy resin on the outside of the card, to give it some basic rigidity for the carbon fibre layering/lamination stage. I used [this] resin and matting. When cured (it takes 24 hours or so), I started cutting the matting and layering it on the inside. This took a week of doing a bit every evening because I left each section to cure before flipping the head over to do the next section, and then re-doing parts that needed a second layer. I'm sure this is in no way the correct method, but it works and looks cool, which fulfils my requirement. Read on later for the unintended structural testing.
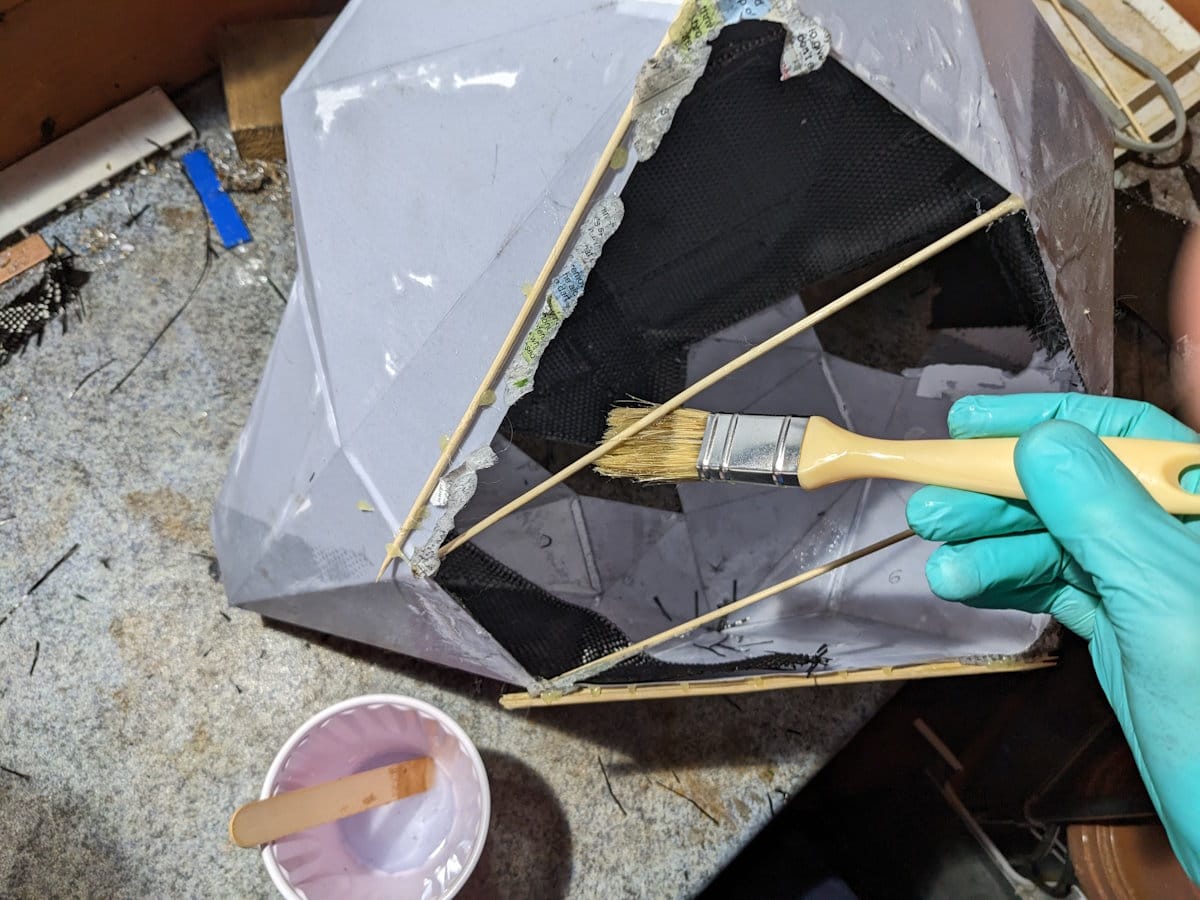
So when that was done I spent a bit of time with a Dremel cleaning up drips from the outside and trimming the overhanging bits. Use a respirator for this, because carbon fibre dust is not nice. Also it 'shorted' the speed control of the Dremel, needing a blast of air to clean up!

In retrospect at this stage I should have glued on various fittings I needed, such as a carry strap on the inside, and thought about how it would fit on my head, eg. a bracket to fit a bump cap helmet liner.
Mirrors
As part of my planning/research I ordered various samples of mirror to figure out what would work best. I used them with various types of glues on various materials (fabrics, the cured resined paper etc), both sanded and not, and pulled them off after waiting a day.
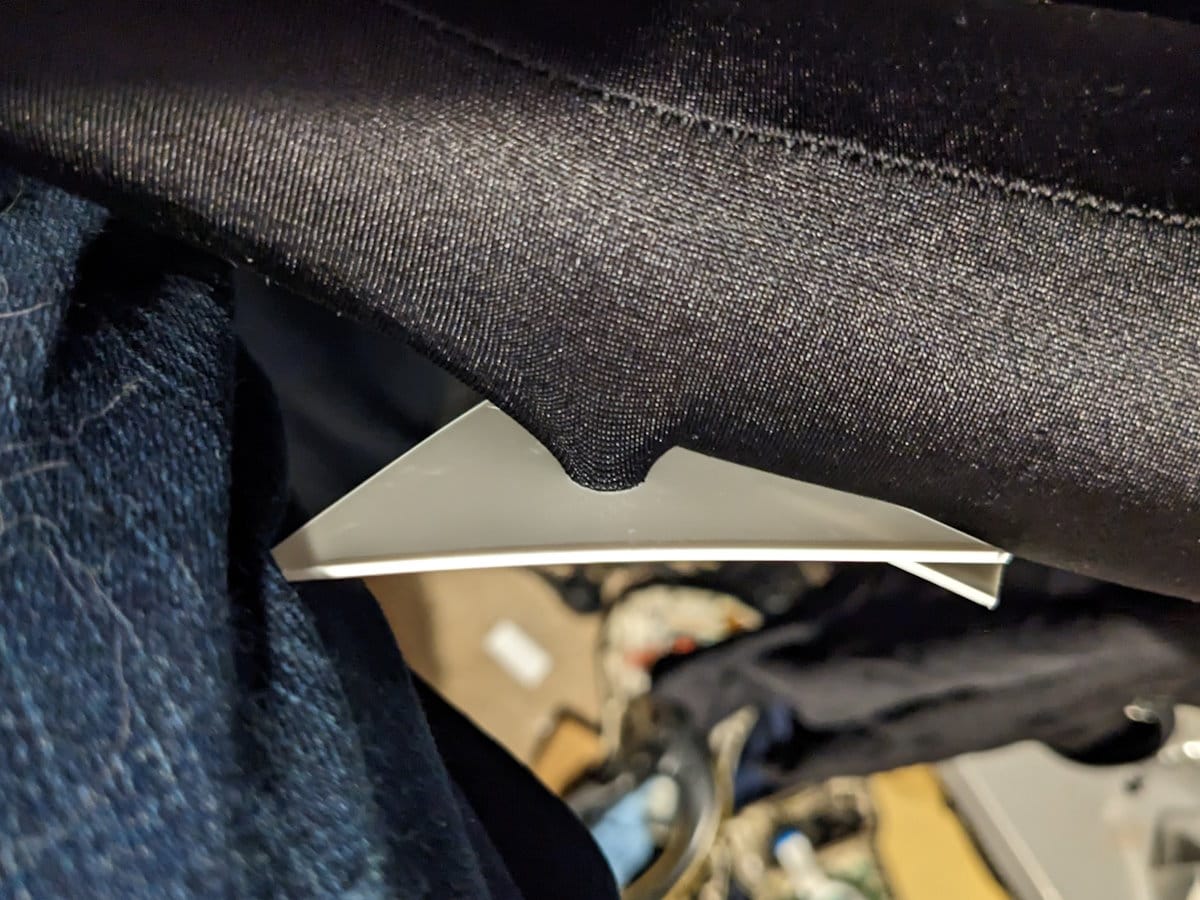
For the head, I decided that 1.5mm acrylic would be best. This thickness is not stocked widely - 3/5mm is most common. I bought mine from Visions in Plastics, who are the UK distributor for Plaskolite Fabback, and were very helpful in supplying samples and pricing. The other material I used, for the body, was 1.5mm HIPS (high impact polystyrene), because it glued to lycra and neoprene fabric in seconds and was very difficult to remove when fully cured. The other reason is that it can be cut just by scoring with a sharp knife and snapping, which makes cutting hundreds of pieces very quick! The disadvantage is that the mirror surface is on top of the plastic with no protection, so any scratches are impossible to fix. The acrylic plastic has the mirroring on the bottom (like a glass mirror) so you can sand and polish out any scratches.
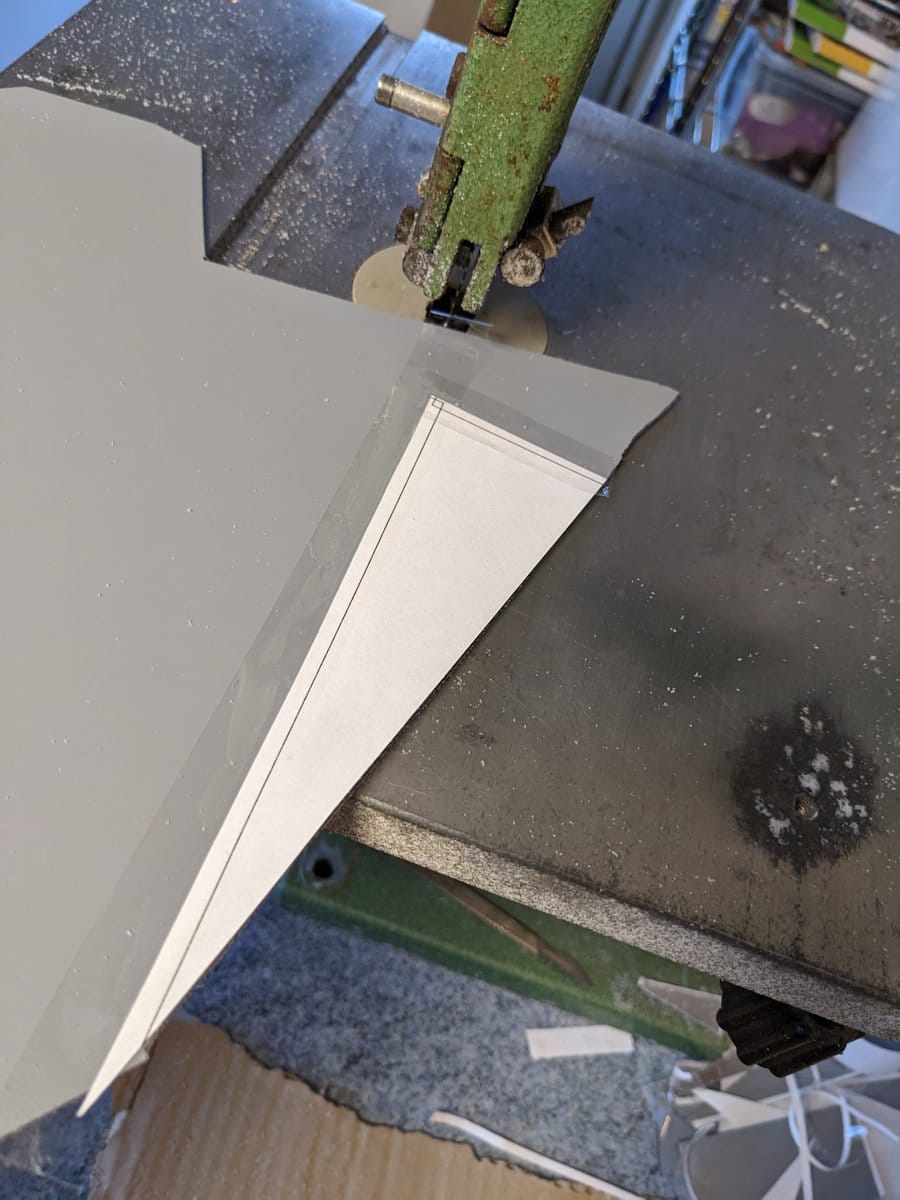
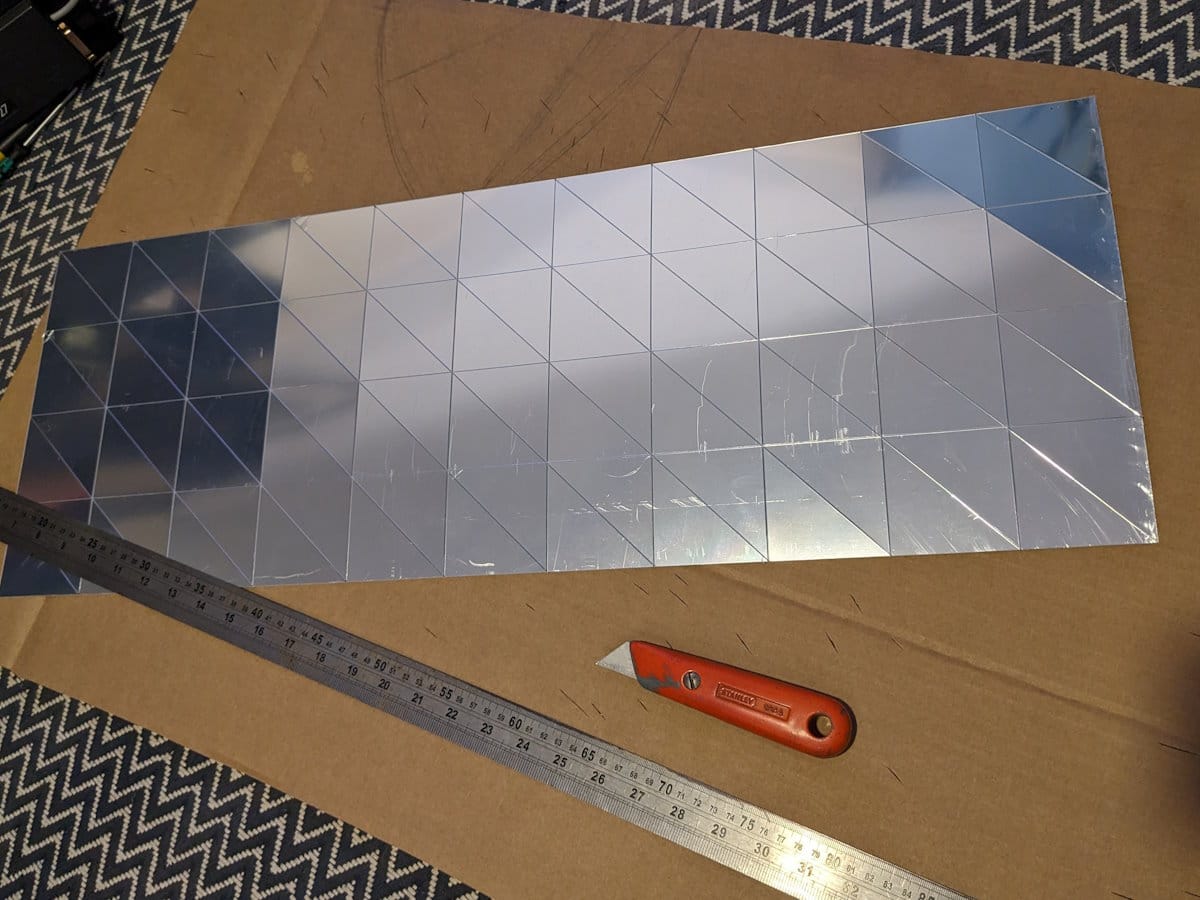
The acrylic cannot be scored and snapped though, it needs cutting using a saw. I decided that a bandsaw would be the most suitable for me, although a scroll saw could be suitable too. I found a 1987 Inca 260 on eBay, which I secured for some £50, minus blade which was another £10 or so from Tuffsaws.
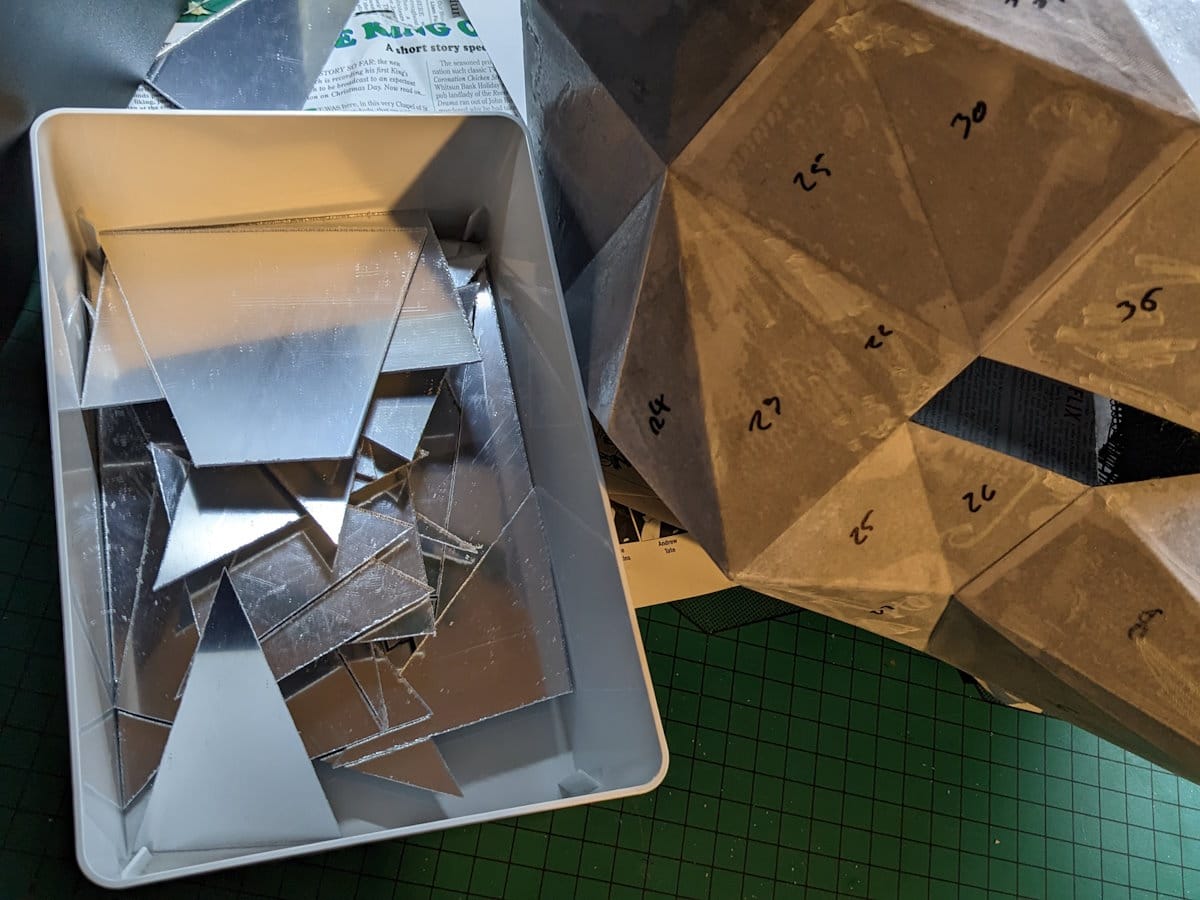
To make a template for each piece I went back to Pepakura Designer, separated every piece and then exported to EPS, contracted the piece by 2.5mm in Illustrator (to make the gap), printed them out on paper, cut them out, sellotaped to the back of the mirror and and cut along the lines as closely and straight-ly as possible. This took quite some time! I had to redo several either because it wasn't accurate enough or the saw snapped the most acute corners. I then sanded the edges and labelled with a number. One problem here is the bandsaw blade I bought is too coarse, and it chipped the edges on many of the pieces, so up close the edges 'sparkle'. I bought 6tpi but I'm sure it really needed 10 or more. TOP TIP: If you want to make a head with the minimum hassle, it will be MUCH quicker to use HIPS mirror and score/snap the pieces. The main disadvantage is that as mentioned above that any damage cannot be repaired without replacing the section, however if you are careful handling and storing it, then even if you have to replace some pieces in the lifetime of the head you'd save a lot of time. I don't THINK it would look very different, and certainly not any worse. I'll cut a piece and lay it on my head sometime to see if you can actually tell the difference.
Gluing required more thought. I had tested and found that regular epoxy resin (Araldite) was best. Wilko own brand was much cheaper though, and if it's not actually made by Araldite I'll eat my hat, because the physical tubes and labels are damned near identical, and there can't be a big enough market for anybody else in the UK to make it. Anyway, after a bit of trial and error the process was to slather the back of a piece in epoxy, line it up and then blob hot glue on a few edges to hold it in place while the glue cures. One problem was that a nose section was not flat! I had to leave it to last, then glue one edge, clamp it, wait for the glue to cure and then glue and clamp the other side. Unfortunately this caused the piece to slowly split over the course of a few weeks, by which time it was too late to replace it. It's on my to-do list to somehow fix.
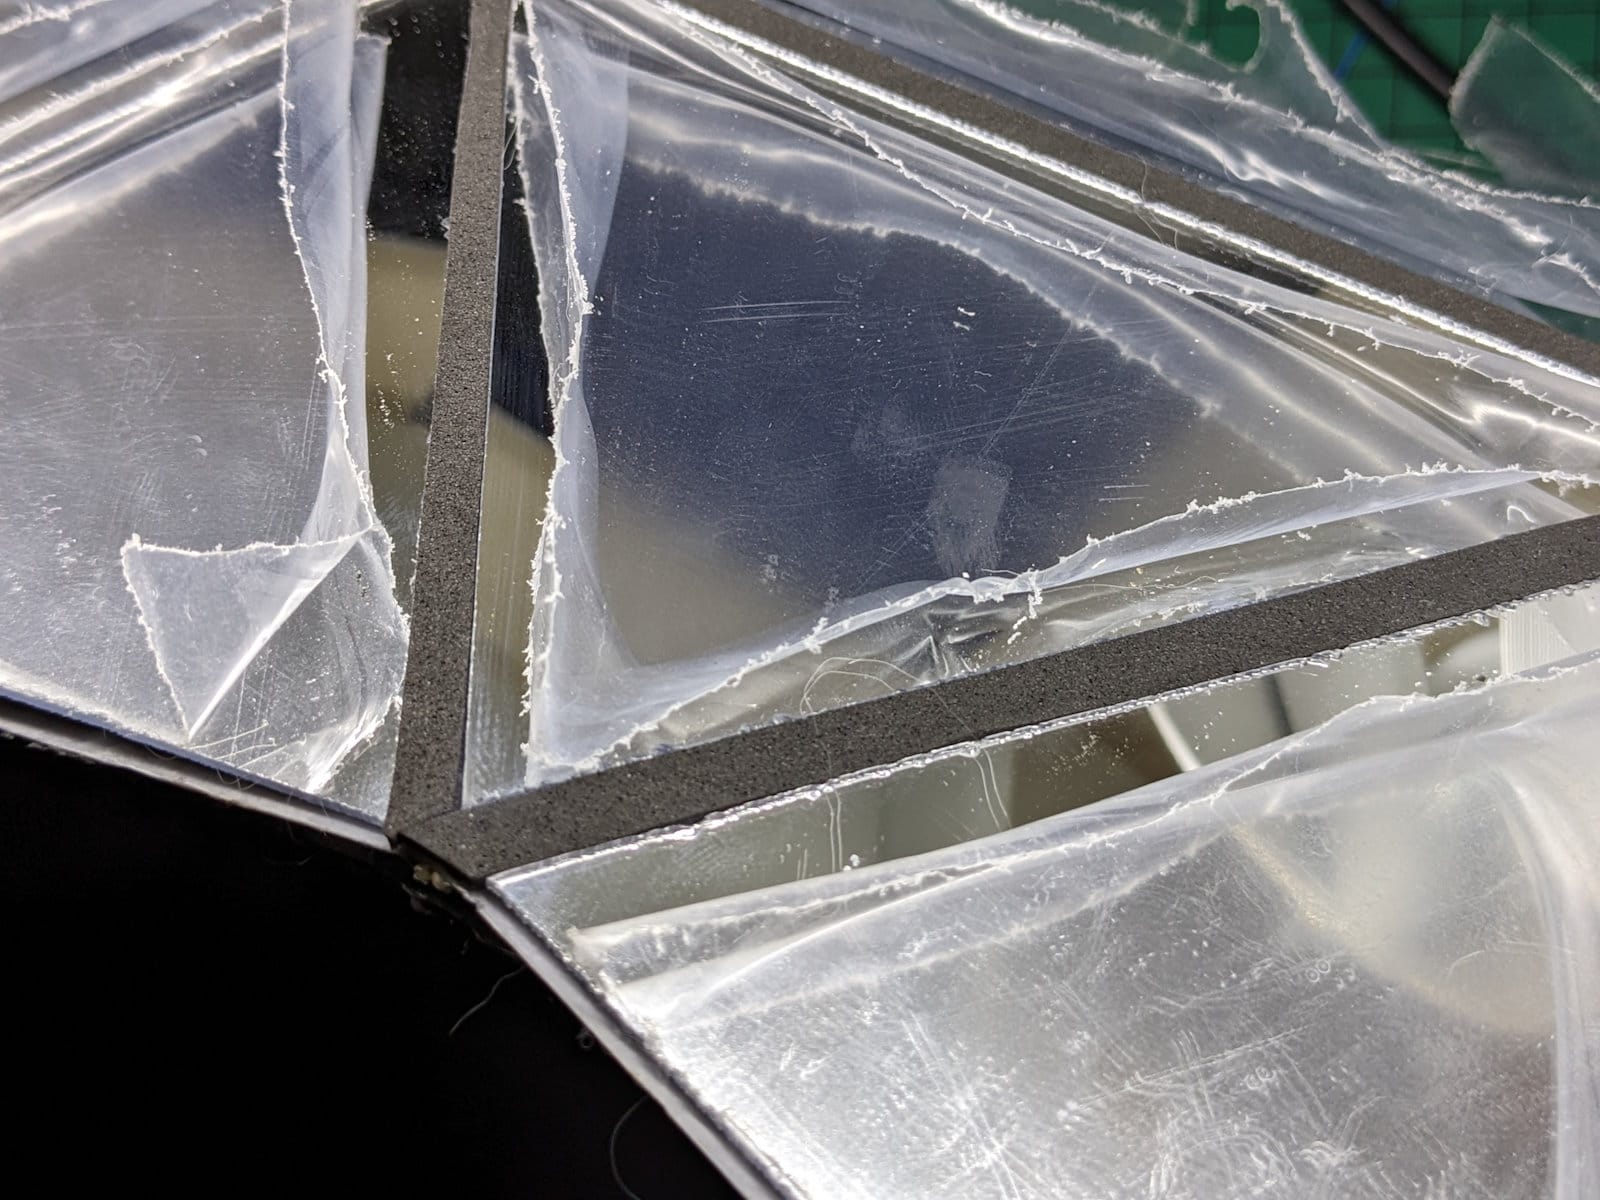
Anyway when all the pieces were on I needed to fill the gaps - somehow. I ran a test using black silicone sealant (random stuff from Toolstation) and immediately realised it would not work, and went back to looking at neoprene and foam. I bought some cheap craft foam from Hobbycraft and found that it was easy to cut and glue, and could be cut slightly oversized and jammed into the gaps. I started at the back (where mistakes could be tolerated) and worked to the front, so my technique was pretty good. It's fairly easy to form into the complicated joins required, you can cut the right shape, dot the back/sides with superglue and then hold into place with a knife blade for a few seconds. At any sort of distance it looks very good. This was pretty time consuming though, I did it a few hours at a time over a number of evenings.
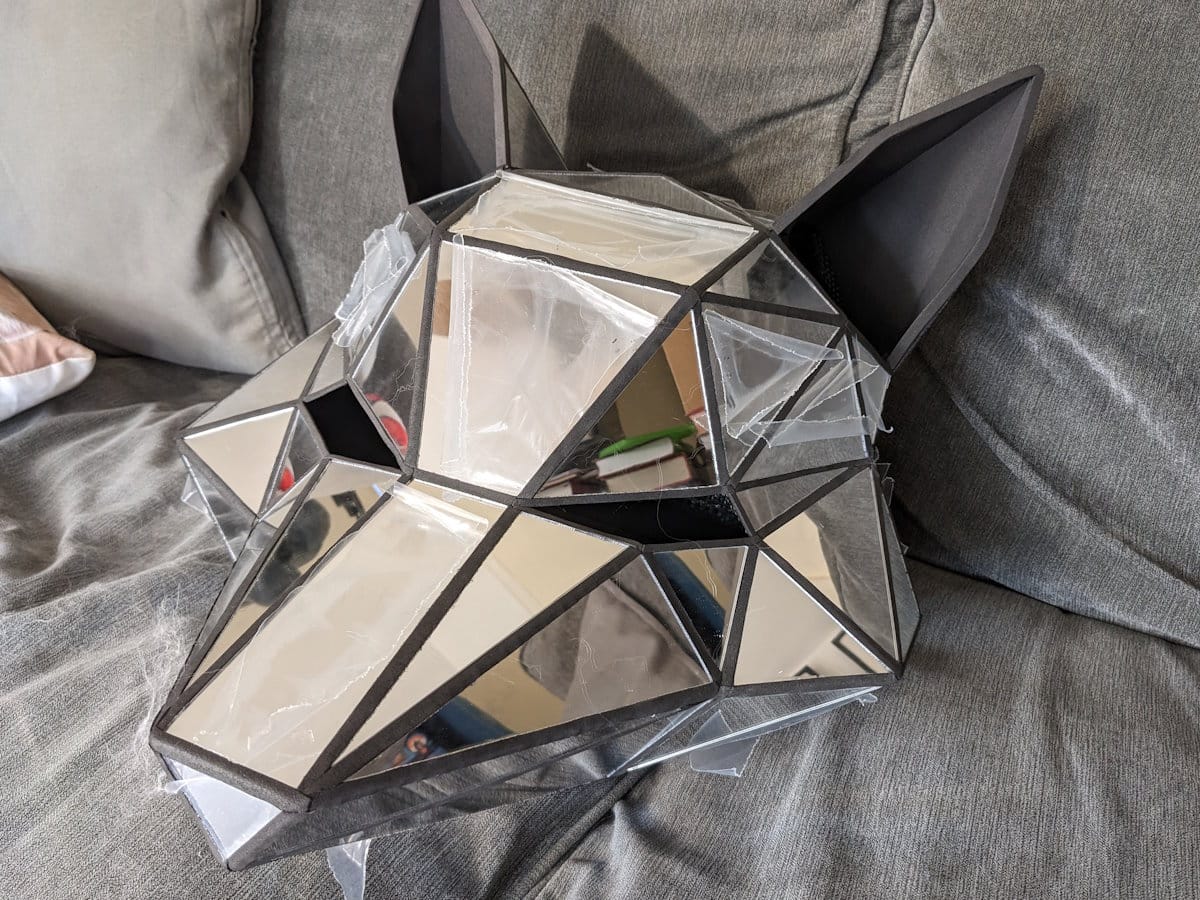
The inner ears are the same foam, the ear edges and the lining of the neck edge too. I hot glued the neck edge's inside because it needed to fold back and contact the inner carbon.
The eye mesh is simple black buckram fabric from [link], just cut and hot-glued into place. One possible alternative would be to use one-way mirror, but you'd need fans/extraction otherwise I'm sure they would mist up crazy.
The ears are covered with mesh fabric, with a foam edge. As mentioned previously, there's an annoying lip that makes this area a bit rough, it could be done better.
Testing
At this stage I decided to give the head a test run at a LondonFurs meet. I made a quick collar/ruff by sketching the shape on a piece of cardboard, wrapping the cardboard in some random black fabric, cutting acrylic pieces to match roughly how it looks on the TV show, and hot gluing it all together. I used strips of foam between the inner edges, the same as on the head. I hinged it in half at the back (using foam) and at the shoulders, and then used webbing and a buckle to secure it at the neck (as on the TV show).
The Fall
The night before the meet I added some foam blocks, and worked out roughly the optimal fore/aft position and the height. Hot glue works fairly well for this, but the glue melts the foam itself so you MUST hold the foam in position for a minute or two, much longer than hot glueing anything else.
I also added chin strap, to replicate the TV suit's head, and because it seemed to make sense at the time.
Anyway, all went ok at the meet, then after wearing it the first time I had another pint and a pizza, then put the head back on to wander outside. However, on walking out I failed to remember that there was a low planter part-way through the outside area, and tripped and keeled over directly onto my face. A huge bang and everybody went silent :D Good news was that the head survived what was a pretty violent test, bad news was that the front of the neck-hole and the chin strap jabbed my throat pretty hard, and I had a squeaky voice for a few minutes, a sore throat for a few days, and a croaky voice for a week! (Thanks to the LondonFurs staff and others for their concern and sorting a plaster for my shin, which also suffered some damage)
Anyway, the following day I replaced the nose piece which was scuffed, and the two 'cheek' pieces which fell off. The mirror backing does not adhere very well to epoxy as it is. I'd advise perhaps lightly sanding the back of every piece if using this material to provide a key, do some testing.
I also reduced the length of the front pieces of the ruf, since it came down too low and straight, and kinda had a Tutankhamun look which is cool but wrong :D
The Body
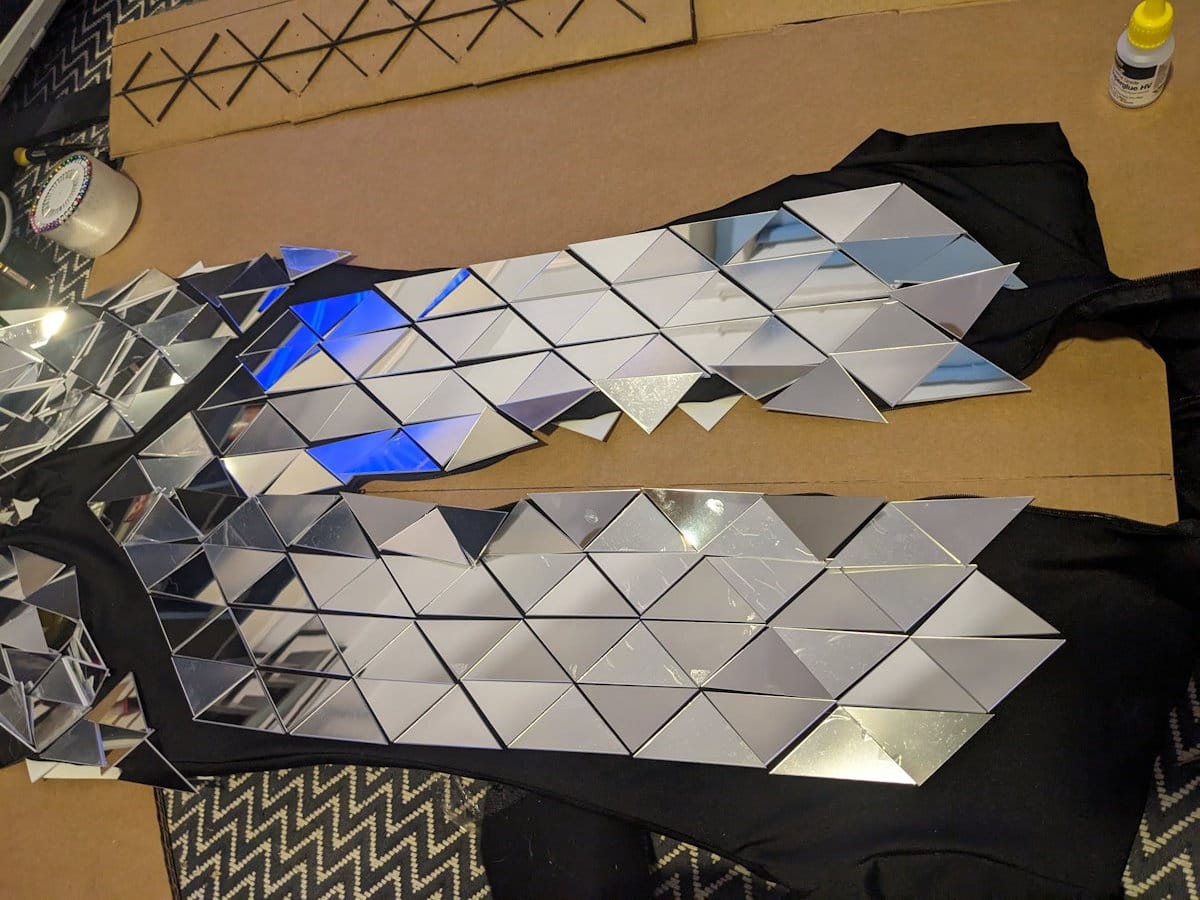
During the initial testing phase I tested gluing pieces of the samples to the spandex materials I had to hand, and tested multiple glues with each sample. I used the top of the zentai hood to test, because I knew I would be cutting that off anyway and using a separate hood. I tested how quickly it immediately glued to the fabric, and then the strength after waiting 24 hours. Incredibly, superglue (cyanoacrylate) worked extremely well, because 'common knowledge' is that it's no good with fabrics. I had assumed that the stretching of the material would cause it to peel away, but this simply doesn't happen. It bonds to the fabric in a couple of seconds, such that in the final build I could drip glue onto the triangle, hold it in place for a few seconds and then move on to the next.
The next question was "how big should the triangles be?". This turned out to be trial and error, and only after I cut dozens of each size and then realised they were too big. I ended up with a size of 73mm on the hypotenuse (37mm on the sides). I reused some of the larger pieces on the shoe covers, and cut a few others down to the smaller size, again for the shoes I think.
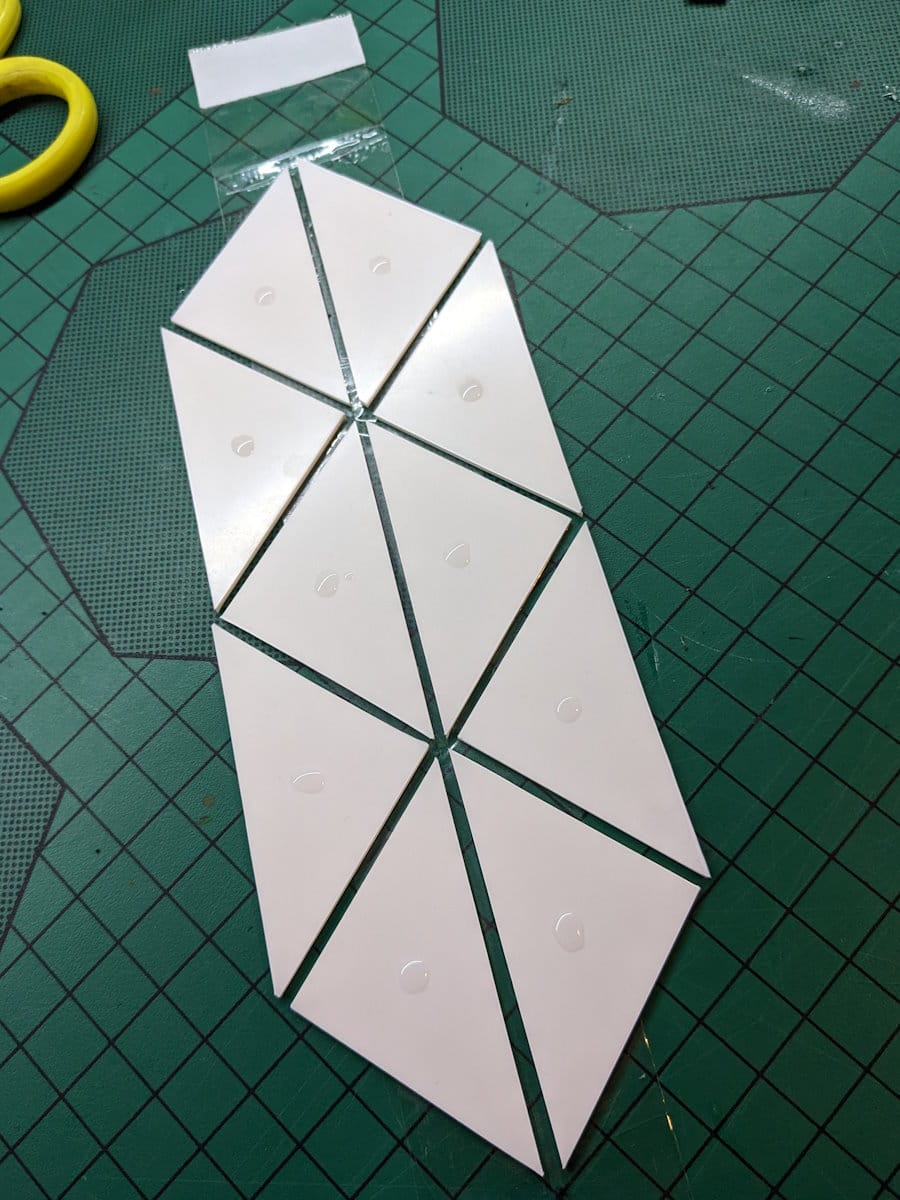
The next problem was how to apply the pieces with a reasonably even look. I decided I'd need to build a jig to lay them out, and then apply as many as possible in one go. I used craft foam to make spacers and glued those to cardboard around pieces of triangle. I actually made several jigs because of the trial-end-error above!

The process was:
- Guess how many pieces I might be able to apply in one go (probably 5 x 75mm is the most I ever did)
- Lay them out in the jig mirror side up
- Apply clear tape to the back.
- Carefully lift the mirrors out of the jig
- Lay them against where they are going to a) check that they fit, b) see how they would need to be pressed and held when gluing.
- Flip them over and lay down on flat surface
- Apply a blob of glue to the middle of each piece. The amount will trial-and-error for your material. Too much and it will take longer to dry, too little and it will soak away and your mirror will fall off
- Carefully lift your taped mirrors and move it to where it needs to go. DO NOT tilt it until you are ready to go, because the glue will run. You want it to be a blob.
- Apply it, press and hold to the body in one movement. Every piece must be pressed down, so use as much of your hand(s) as possible. It's ok to release pressure in one part and move to another, just move back and forth. DO NOT move the pieces once applied to the fabric. If you get it wrong them immediately remove everything, then quickly wipe the glue off with a paper towel and try again. I found it was fine to just add more glue, even superglue on dried superglue works fine!
- I found that 5-15 seconds was enough for the glue to set, but usually pressed for longer just in case
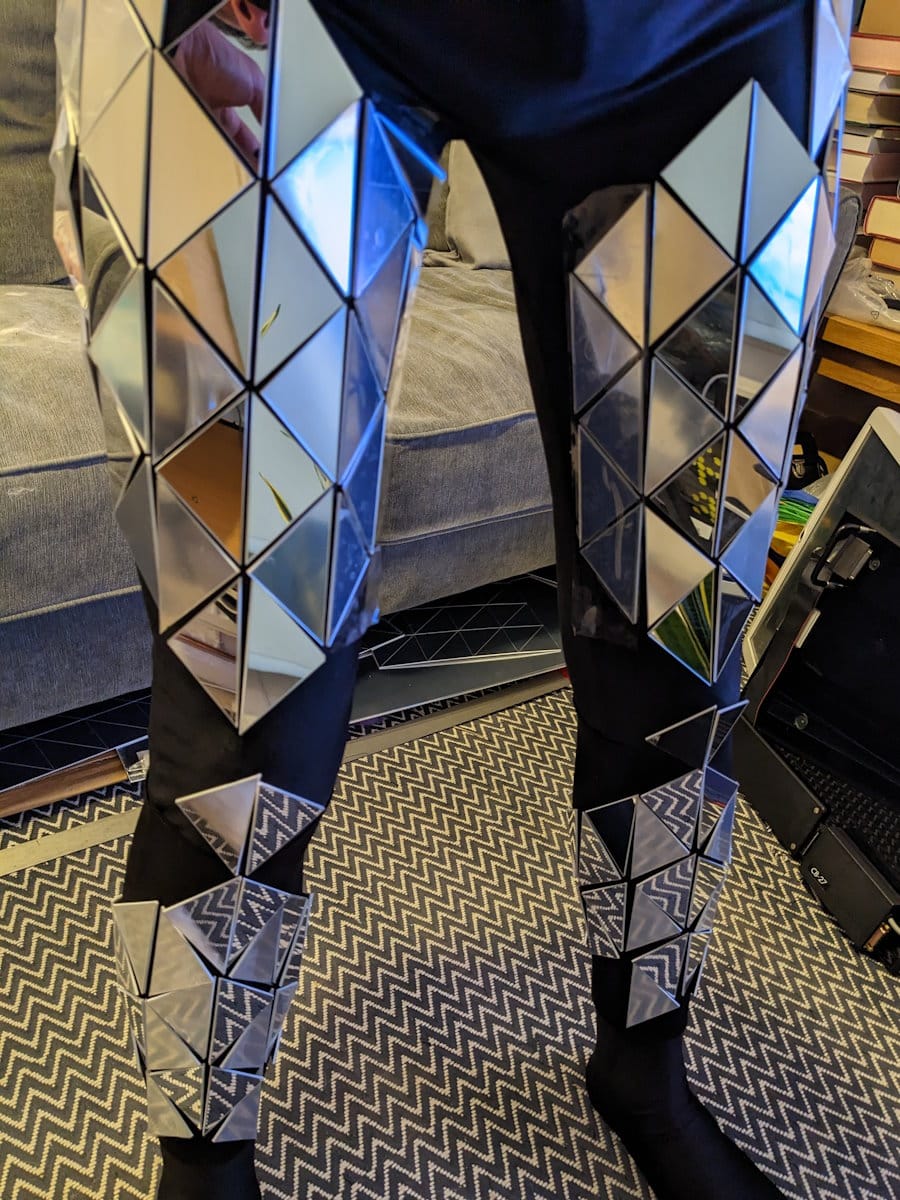
Regarding the layout - I mostly looked at photos and video of the TV suit and then just tried to replicate the look and feel in general. The biggest difference (which is still minor!) is that the TV costume uses two different sizes of triangle on the front of the body, whereas I had got bored of making jigs and decided to make it all using the 73mm size. I started with the knees and then worked up to the tops of the legs, and by chance when I got to the crotch it ended in about the right place, and I didn't really need to add any small pieces because the angles were about perfect. I think I then added a vertical row to the left and right and then realised I'd need to make a jig to run the pattern 'sideways' to wrap around to the back of the legs, because the way the design flowed front to back was quite critical, and adding rows vertically would make it quite hard to ensure it was all straight going sideways.
I then worked up and backwards (wrapping around the inner thigh) until I reached the leg/butt split.
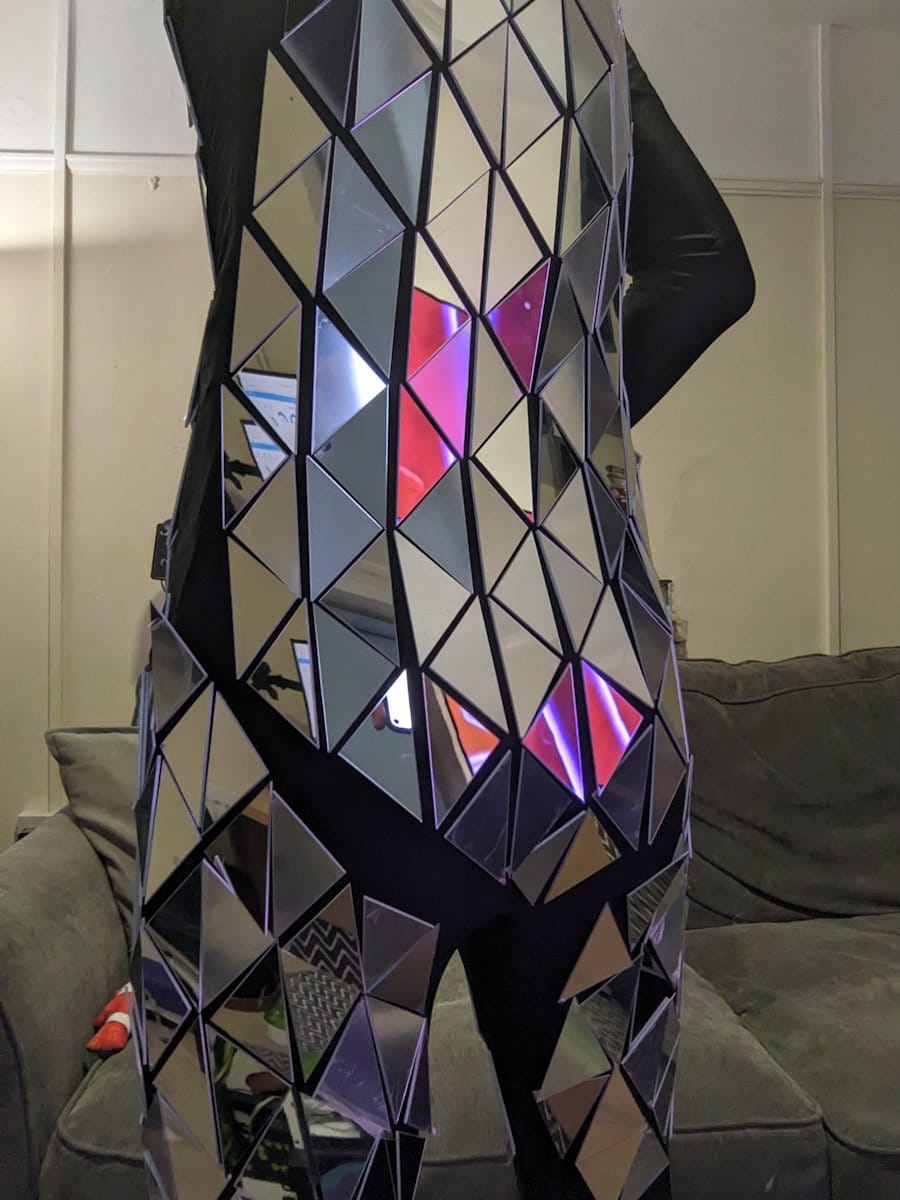
I'm trying to remember how it went, but I think I then did the front of the torso using the 'vertical' jig again, and then started on the back of the torso. For this I couldn't wear it and put the pieces on (I'm not a contortionist!), so I pinned the suit to a piece of shaped cardboard, stretching it out by guesswork, and glued the pieces on like that. Incredibly, my guesswork was pretty good, and the back looks really good!
Upper arms
This was perhaps the most difficult part, because I had to apply the pieces using my opposite arm, and getting the position and angle correct. This is also where I made a mistake, basically at the shoulder the left arm pieces ended too low for some reason, and fixing it would require ripping off about 10 triangles, too many to risk damaging the undersuit. I fixed it by cutting some special triangles for the final two at the top, they are a bit taller. In reality nobody would have even noticed the mistake if I left it, let alone the fix. TOP TIP: when placing mirrors, think about whether the start or end position is most important, and if both are important then triple check the placement of the undersuit seams etc. and do plenty of dry runs.
Lower legs and forearms
Right from the start I decided that the outer limb parts of the costume would need to be separate, to avoid them flopping around and getting caught up when putting the main body on. I bought some 2mm neoprene because I thought it would be thin enough to be flexible, but rigid enough to be easy to put on and take off. I tested gluing onto this fabric and found it was similar (good) results as the spandex, but a bit more glue was needed because it soaks it up.
I then bought a sewing machine and sewed up some tapered tube shapes based on my measurements. I applied the pieces mostly just by looking at the photos of the real thing and replicating the general "look and feel", since it was hard to figure out the exact layout even with plenty of source material. One important thing was to ensure that when the arm is straight the triangles down the outer arms all line up. Comparing the resulting photos I think I got it all pretty close.

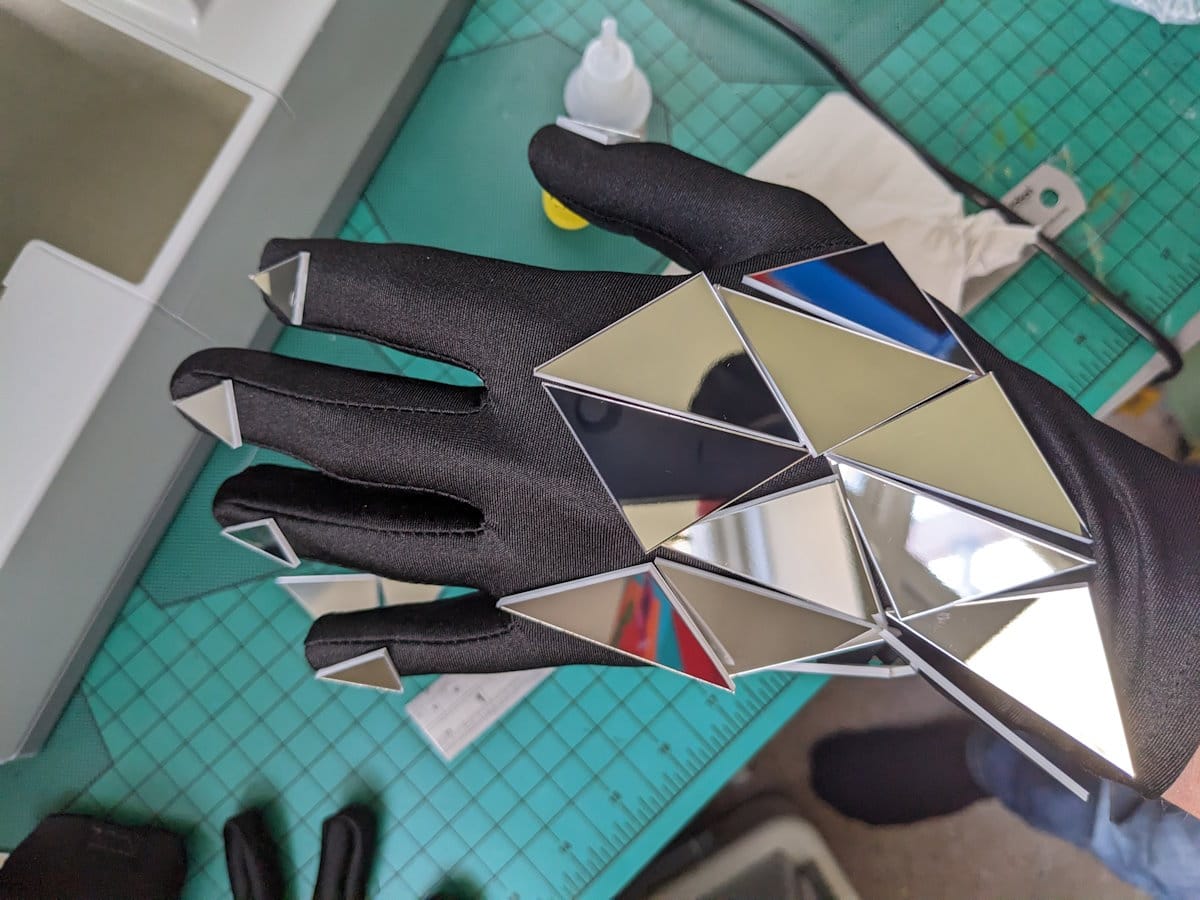
Gloves
This was probably the easiest part. I didn't have any very detailed pictures of the real thing, so I just cut some smaller triangles and placed them in a way I thought looked cool. The real gloves seem to have long acrylic fingernails as claws, but I wanted something a bit more practical so I just glued small triangles onto the fingertips, short of the ends. When I make a replacement set (they have worn out already) I might try making some which protrude slightly.
Dance belt
When wearing a tight costume, guys need to keep themselves decent, and a dance belt is the standard way to do this. I use a Capezio 5930, but there are many choices. When I wore the suit for testing I found that the legs did being to slide down very slightly, so I sewed about 10cm of 'loop' velcro to the outer seams on the undersuit, and a long strip of 'hook' velcro vertically to the dance belt where they would meet. Then when putting on the suit I would get the legs in the perfect position, then reach down inside the suit and lay the velcro against each other. I found this worked very well, and they stayed in position. I did sew a piece on the rear to keep the butt in place, but it wasn't very successful because when bending over the fabric shifts too much. A future improvement is to make some sort of elastic strap.
Shoe covers
The real costume uses painted chunky boots (I'm not sure the brand/model), but I didn't want to have to go and find the shoes in my size, paint them up, and then have to haul them everywhere with the costume (although I guess I could just wear them...). I decided to make shoe covers with the neoprene, and I made them by basically just eyeballing the shapes needed cutting the fabric up and sewing it (which took a bit of trial and error). The neoprene is thin enough that the ankle can just pull over my foot. There's a neoprene strap underneath about halfway along, and then an elastic strap at the toe. It all worked perfectly!
Second trial run
At some point I had realised that there would be another LondonFurs meet before Confuzzled, so I quickly finished the final bits, made a packing list and packed it all into my Pelican case. I wrapped the body and sleeves by rolling them in a towel, which worked pretty well.
Thankfully the second trial had no disasters, and I think only one piece fell off the shoe covers. When looking at the photos after, I decided that I needed to add another row to the top of the chest, a few around the front of the shoulder, and some more on the shoe covers.
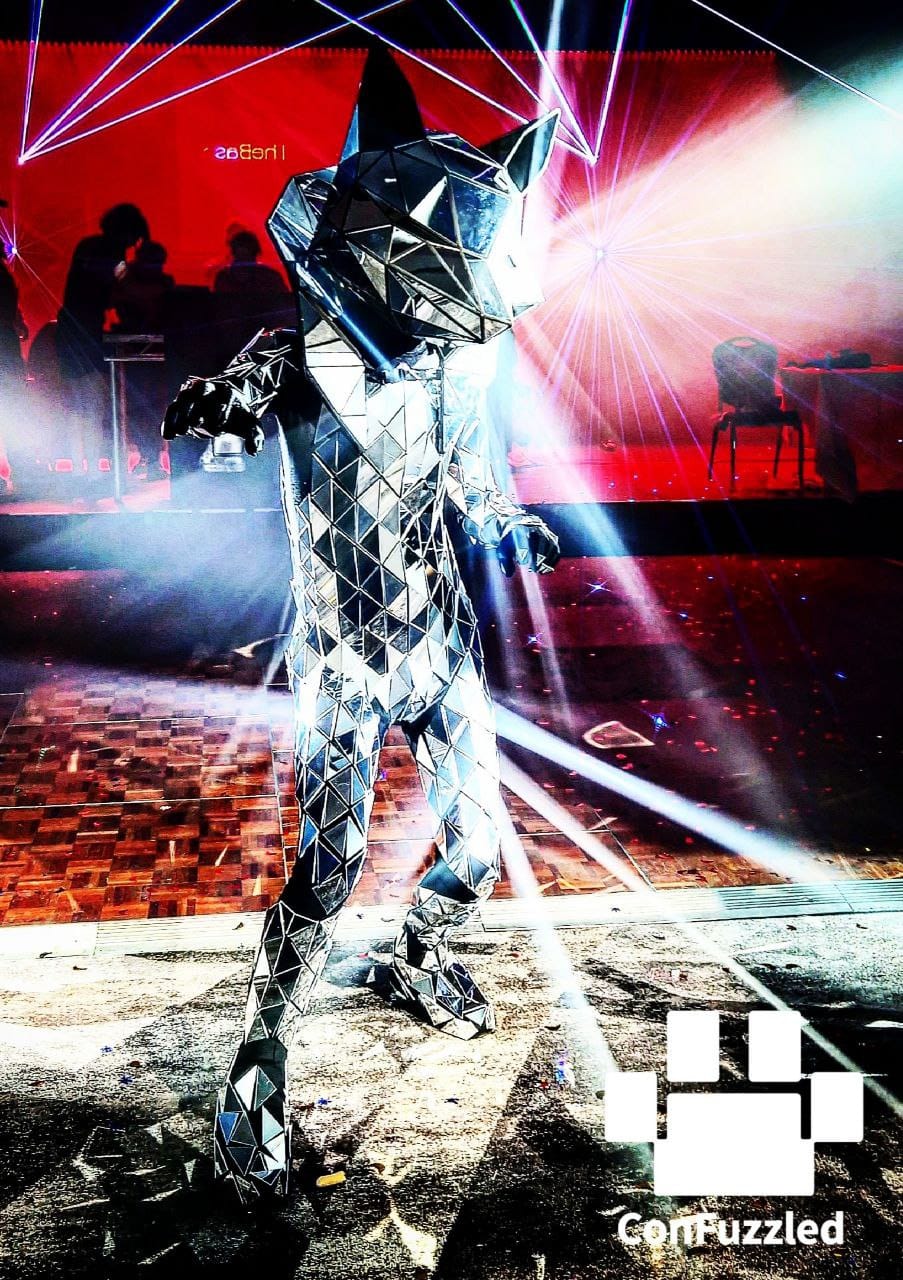
ConFuzzled
This was my target date to build the suit, and the final week wasn't very rushed, since it was just fiddling here and there.
Basically it all went very well! I was at the overflow hotel and after walking the route once, decided that it would be fine to get into the suit at the Crowne Plaza and walk to the Hilton. I walked it with the head off once to be sure, and then mostly walked with the head on, except when I was in a hurry and didn't want too many photos. And there were MANY photos both on the way and at the con, it was pretty popular!


Improvements to the costume
A short list of things which should be improved. Not all of these will be done on the current suit, some may be only done to any second suit:
- Vision is quite poor, needs a different type of eye mesh
- Head foam is not secure enough, needs a proper internal harness of some sort
- Extremely hard for people to hear you speak. Hearing others speak is fine though. Possibly speakers in the ears might work, or just live with it. An entirely different construction method would also be better I'm sure, eg. a 3D printed skeleton frame where the mirrors are glued only at the edges and have nothing behind them, but I think that would be quite weak and may not actually be any better.
- The back fabric sags a little under the weight of the pieces. Could use either an internal support strap over the shoulders, or use 1mm HIPS plastic to save 1/3 weight.
- The mirrors on the head smudge quite easily. This is probably just a case of only handling it with gloves when polished. When DvO showed the head on "Loose Women", Linda was wearing white gloves, so it's something they were very careful about on the show.
Improvements when building it
I now have a 3D printer and I'd probably print the mirror alignment jigs, because the ones I made were quite fiddly, and not hugely accurate
I am currently looking at how to 3D print the head with integral mirror spacers, ie. I'd just need to cut mirrors from a template and glue them directly onto a frame.
Feedback
I sought some advice from friends and in tech/engineering groups when building this and used some ideas. I'd be interested in thoughts from others. I'd also be interested if anybody knows how the mirror pieces were affixed on the real thing. I found some selfies that Denise van Outen took behind the scenes which show the pieces but they aren't tilted quite enough to show the undersides!
If you have any comments or would like to me explain anything in more detail then leave a comment below, or email me at [email protected].